

Start here
Quick start
From a downloaded archive to your first diagram in about five minutes. These steps were run for real on an Apple-silicon Mac with the osx-arm64 archive; the output below is what that run printed, with file paths shortened. Linux is the same except for the archive name. Windows differs (PowerShell, and the setup code is in a protected file when you run it as a service) and is covered on Install, where it is now marked as run on Windows 11 Arm64. On 1 October 2026, for the refresh of this site, the start-up log, the first-run page and the migration count were re-checked on the current build run from the repository (a release archive could not be built that day: the Mac was out of memory), so the lines below reflect it where it matters. No archive was built for the 5 October update either: the step-by-step output below is still from that 1 October run, and the commands on this page that did not change were not repeated.
A Mac or Linux machine, a modern browser, and the archive for your platform with its SHA256SUMS file. Downloads are provided to licensed customers (write to draughtsman@overpass.co.uk). You do not need .NET, Node, Docker or a database: the archive carries everything, including its own Node runtime.
-
Check the download
Put the archive and
SHA256SUMSin one folder.
Outputshasum -a 256 -c SHA256SUMS --ignore-missingdraughtsman-0.1.0-osx-arm64.tar.gz: OKOn Linux use
sha256sum -c SHA256SUMS --ignore-missing. -
Unpack it and allow it to run
Outputtar -xzf draughtsman-0.1.0-osx-arm64.tar.gz xattr -dr com.apple.quarantine draughtsman-0.1.0-osx-arm64 cd draughtsman-0.1.0-osx-arm64 ./draughtsman --versionDraughtsman 0.1.0 (build 2026-10-01)The
xattrline is for macOS only. The archives are not yet code-signed or notarised, so Gatekeeper stops the first run of a downloaded copy until the quarantine flag is removed. On Linux skip it. -
Start the server
./draughtsmanIt binds
Output (trimmed)127.0.0.1:5180and keeps its data in adata/folder beside the executable. Run from a different folder with an empty environment (env -i), this printed the lines below (trimmed;/srvstands in for the folder we unpacked into). The line you need is the setup code.info: Draughtsman.Server.KeyRing[0] Key ring protection: key-encryption key in the macOS Keychain (item "Draughtsman data key ring", account 1c49...). ... info: draughtsman[0] Draughtsman 0.1.0; data folder /srv/draughtsman-0.1.0-osx-arm64/data; storage sqlite info: draughtsman[0] Bound to loopback 127.0.0.1, so the API is reachable only from this machine; every route still requires sign-in except health, theme and the sign-in endpoints. info: draughtsman[0] Applying 8 storage migration(s) to sqlite: 20260921080129_Initial, ... warn: draughtsman[0] ================================================================== First-run setup code: CDEGS7T9KP Enter this on the first-run page (or POST it as setupCode to /api/auth/first-run) to create the administrator account. Valid only until an administrator exists; restart to get a new code. ================================================================== info: Draughtsman.Server.Licensing.LicenceService[0] No licence file at /srv/draughtsman-0.1.0-osx-arm64/data/licence.key: running as an unlicensed evaluation, fully working. info: Draughtsman.Sidecar.NodeSidecarClient[0] Sidecar 0.1.0 running on Node v22.23.3 (pid 55152) from /srv/draughtsman-0.1.0-osx-arm64/sidecar/sidecar.js info: Microsoft.Hosting.Lifetime[14] Now listening on: http://127.0.0.1:5180On a Mac the first start stores a key in your login keychain (that is the first line). It protects the AI key you may store later; see Security. To check it is up:
Outputcurl -s http://127.0.0.1:5180/api/health{"status":"ok"} -
Create your administrator
Open
http://localhost:5180in a browser on that machine. Enter an email, a display name, a password of at least 12 characters and the setup code from the terminal. The code is valid only until the first administrator exists. Run as a Windows service, the code is not in a log but in a file only administrators can read;draughtsman first-run-codeprints it. More on this step in First run.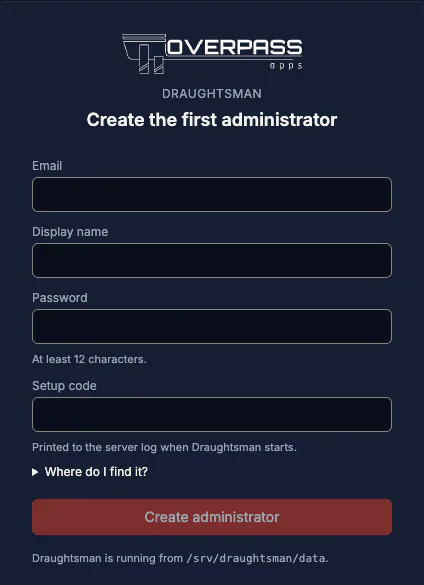
The first-run page. The shipped theme is dark; yours can be anything, see Themes and branding. -
Make a first diagram
The fastest route is to paste text. Choose Import Mermaid on the home page, paste this, give it a title and choose Read diagram. It reports what it found (here: 5 nodes and 4 connectors). Nothing is saved until you choose Create diagram.
flowchart TD
  A[Customer places order] --> B{In stock?}
  B -->|yes| C[Pack and ship]
  B -->|no| D[Backorder]
  C --> E([Delivered])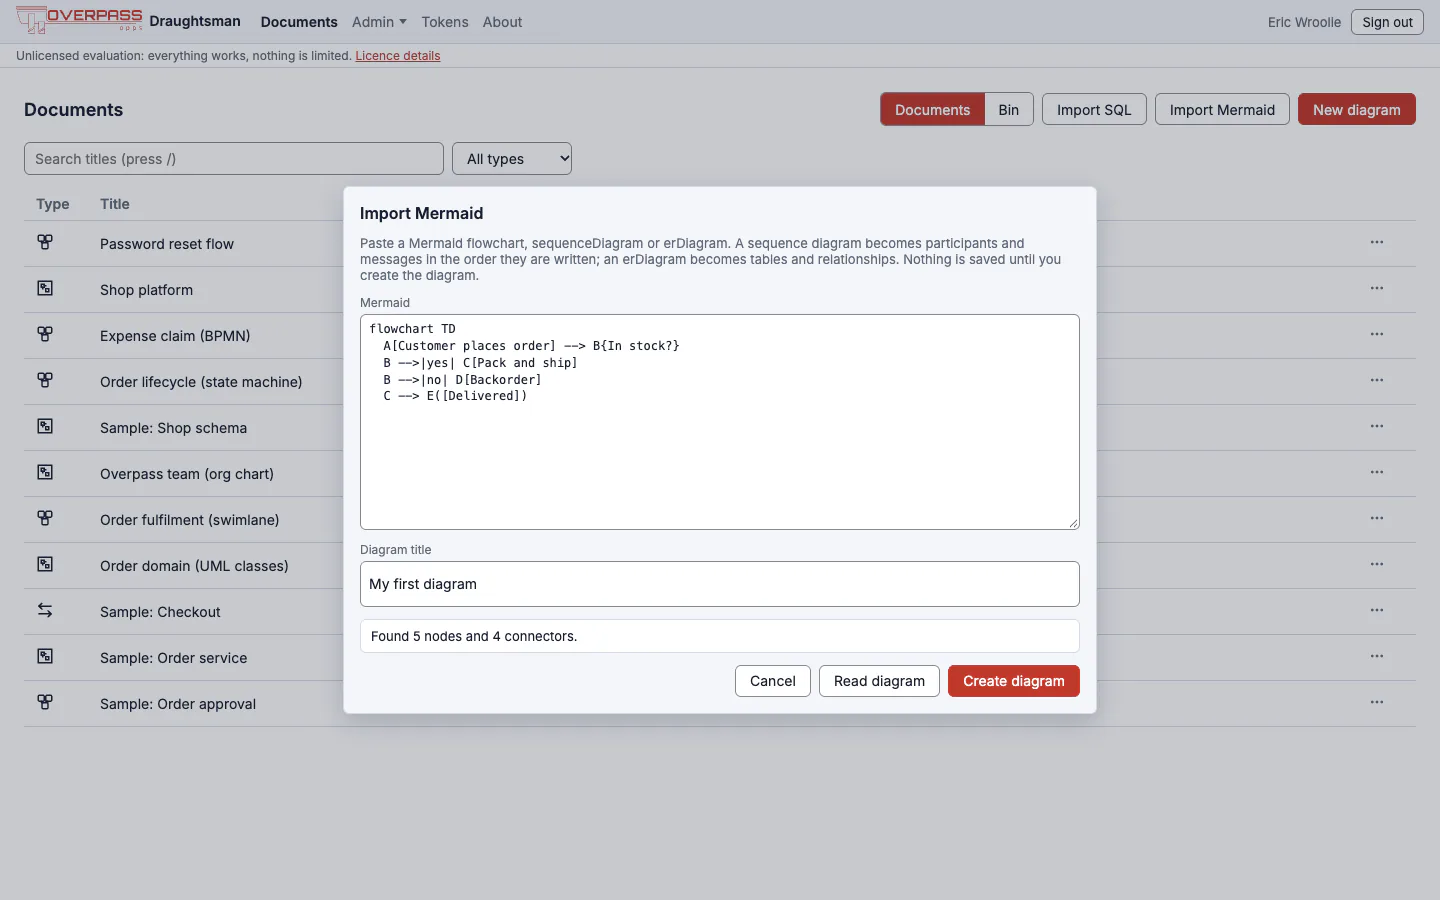
Import Mermaid reads the text and reports what it found before it creates anything. The new diagram opens in the editor. Mermaid carries no positions, so Draughtsman lays the graph out for you, and the layout is yours to adjust. Menu, Tidy layout re-runs it whenever you like.
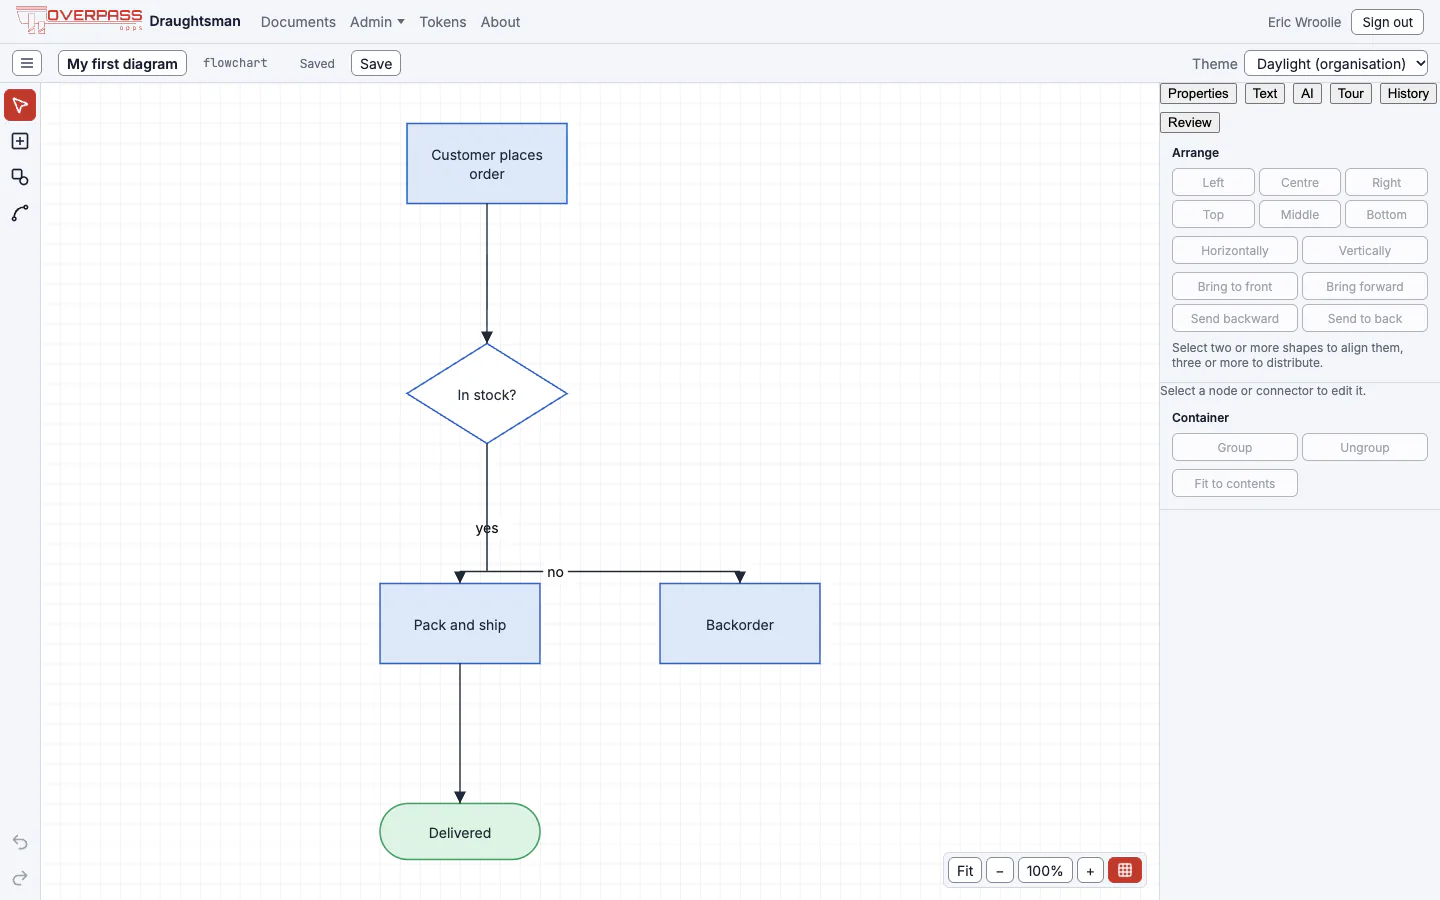
The imported flowchart in the editor. Autosave has already stored it. -
Or draw it by hand
Choose New diagram, then Flowchart. Press S to open the shape panel and drag a shape onto the canvas. Double-click a shape (or select it and press Enter) to type its label. Select two shapes with a marquee, press L, and they are joined in the order you selected them. That sequence was run in a real browser for this page: the marquee selected two shapes and L drew one connector from the first to the second. Cmd+Z undoes it exactly. Press Cmd+K for a searchable list of every command.
-
Export it
Open the file menu (the three-bar button at the top left of the editor) and choose Export SVG or Export PNG, or Export PDF… to open your browser's print dialog and choose Save as PDF. All three are produced in your browser, so none needs an optional component. An unlicensed copy adds a small evaluation notice under the picture (see Import and export). Every diagram on the Diagram types page was exported this way.
Stop the server
Press Ctrl+C in the terminal. Your diagrams stay in data/ and are there when you start it again.
Next
- Install for a service that starts at boot, Docker, or Windows.
- The editor for the whole tool, with the keyboard shortcuts.
- Agents and MCP to let Claude Code draw into the same instance.
- Password recovery and email and Upgrading safely, for the day someone forgets a password or you install the next version.